This section is a bit more advanced, and you might not understand everything right away – that’s ok, just having some exposure to the concepts will help it to sink in faster during class.
What is Github & why do we use it?
Imagine working on your website for hours, and then accidentally deleting everything and losing your work. Github helps us avoid that problem by storing every single version of our website securely in the cloud.
You often hear people referring to git and github, so let’s start by defining those.
Git is a widely-used version control system used to manage code.
GitHub is popular hosting service for Git repositories. GitHub allows you to store your local Git repositories in the cloud.
- from Codecademy
In short, GitHub is a platform that runs using Git. There are other services to host Git repositories, but GitHub is a trusted, free service used by organizations across the world, big and small.
By using Github we can save drafts of your code so that you can look back at previous versions and potentially undo complicated errors. And since github is used on almost every collaborative website project, we think it’s a pretty valuable skill to learn.
The basic git workflow.
1. Create Repository. Your website is stored in a ‘Git Repository’. This is your website folder where Github will monitor all changes and keep a history of every version of the site. You’ll have a new repository for every new website you create.
2. Commit Changes. When you make changes to your website by editing the code or adding new images to your website folder (your repository), you ‘commit’ those changes to Github and create a new saved version of the site.
3. Push the changes to the cloud. Once you have created a new ‘commit’ you need to push (kind of like uploading) those changes to the cloud, so that they aren’t just saved on your computer.
4. Pull recent changes from the cloud. Let’s say you are using a content management system that might make changes to your code, or have another person collaborating with you. You need to make sure you are working on the latest version of the website, so you ‘pull’ any recent changes from the cloud version down to your local version on your computer.
5. You are in sync. At this point, you local version and cloud version will be perfectly in sync and you’ll have a history of every past version that you can always go back to if you want to. Unless the changes you made locally and the changes that were made elsewhere (by someone else or through the content management system) conflict, in which case we move to the step below.
6. Resolving Merge Conflicts. Let’s say that you editing the heading of your home page banner, and at the same time someone edited the heading through the content management system to say something different. Github has two conflicting changes and it needs you to resolve the merge conflict by choosing which version you want to keep (in this case, which heading).
Adding an existing website to Github
(You don’t need to try this before the course starts, but it can be interesting to have a look).
Before you start save all your files in Atom and close Atom.
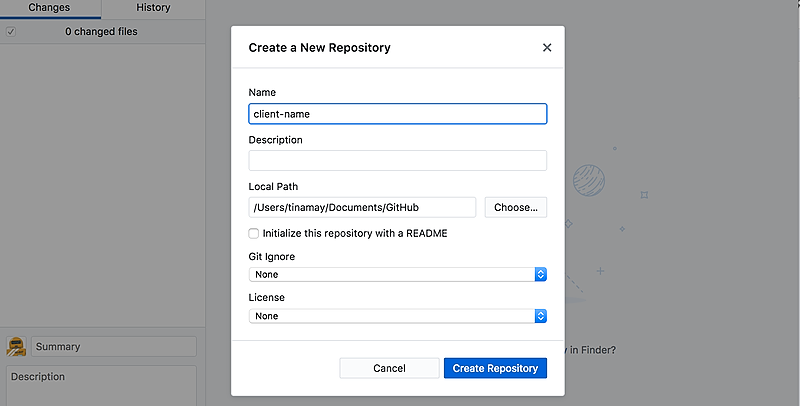
- Create a new repository ‘File > New Repository’
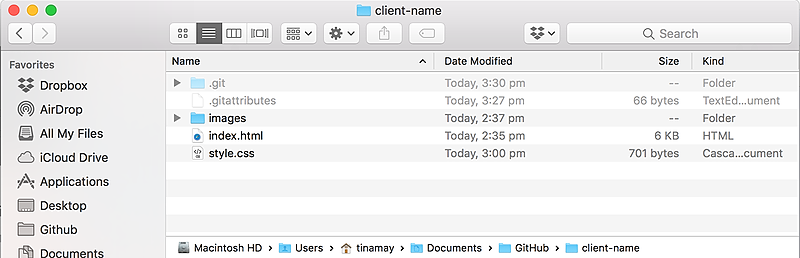
- Copy your website files into that folder on your hardrive (In this case I want to move them to /tinamay/Documents/Github/client-name)
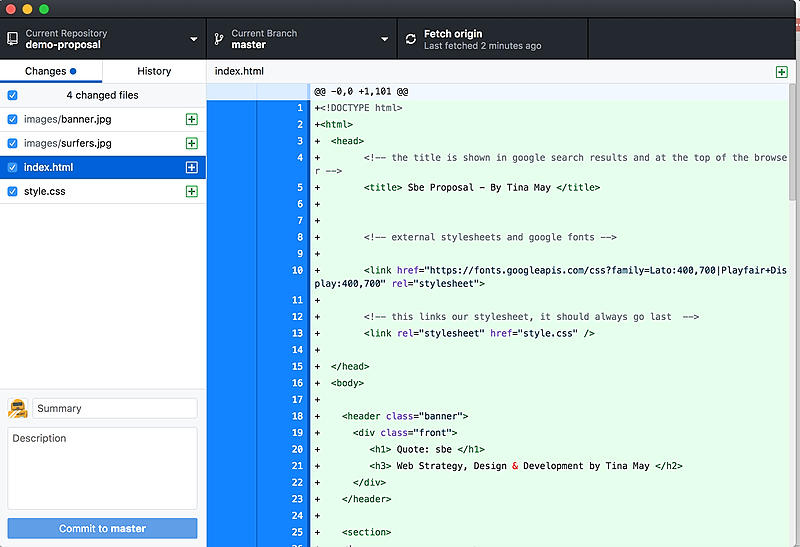
- You should see all of the changes (your initial files) in the left hand pane. Add a summary (for example ‘Initial commit’) and a description if you like and then select ‘Commit to Master’.
- Press Button - Publish Repository
- WOOOO HOOO YOUR WEBSITE IS ON GITHUB
Now to edit your website re open Atom and make sure you select the new folder (which is typically inside a folder called Github. This is important, otherwise you might be working on the original version not the cloud version. If you do keep the original version, consider changing the name to client-site backup)